Before the Princh Copy & Scan solution can be enabled and utilized, there are two steps which must be completed:
- Establishing connection to the scanner device on the MFP through the Princh Administration Panel. Please refer to our guide on how to establish connection to scanner device.
- Configuring the Copy & Scan settings in the Princh Administration Panel, once the connection has been established. Please refer to our guide detailed below.
The option to enable Copy & Scan in the Princh Administration Panel will not be available before a connection to the scanner device has been established and the solution activated for your organization.
Configuring the Copy & Scan settings
- Log in to the Princh Administration Panel and select the "Printers & Locations" tab from the menu to the left on the screen.
- Click on the blue 'Edit' button for the printer you wish to configure.

- Within the 'Edit' pop-up window, you will find a variety of copy and scan settings that can be customized to suit your needs, namely:
- Enabling and disabling Copy & Scan to email.
- Changing Copy & Scan resolution.
- Enabling and disabling specific device features.
- Enabling and disabling different paper formats, as well as adjusting the scanning rotation.
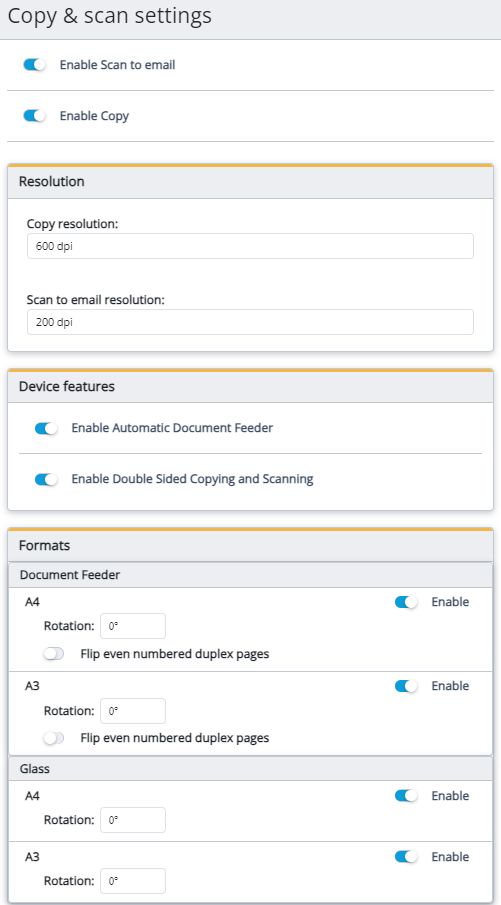
The standard paper format will automatically be adjusted based on your location.