Adding more printers to your Linux print server for Princh is a straightforward task that involves just a few easy steps.
Steps detailed in guide below requires the Princh Cloud Printer application to be installed. If you do not yet have the Princh Cloud Printer application installed, please refer to our guide HERE.
Creating and configuring printers from the terminal
- Open the terminal and run the following command:
$ sudo princh-setup - You will be prompted to enter the following information to configure the new printer as a CUPS Print Queue:
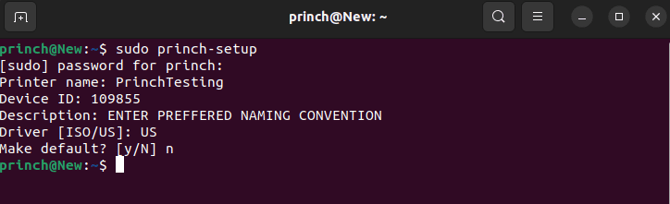
- Printer name:
- You are free to choose any name for the printer, but make sure to avoid using special characters or spaces in the name.
- Device ID (printer ID):
- The printer ID be identified through the Princh Administration Panel.
- Description:Driver [ISO/US]:
- Choose the appropriate option based on your location. Select US for North American locations and ISO for the rest of the world.
- Make default? [y/N]
- If you select "yes," the Princh Cloud Printer application will automatically be selected as the default printer.
- If you select "yes," the Princh Cloud Printer application will automatically be selected as the default printer.
- Printer name:
- The new Princh Printer has now been configured as a CUPS Print Queue and will be a selectable Princh option.
- Send a test print through to the new printer to ensure that printing through Princh is working.
- If you encounter any issues or if printing is not functioning properly, feel free to contact Princh Support for additional assistance.