Overview
Uninstalling the Princh Cloud Connector is carried out in three simple steps:
- Stop the "PrinchSoftwareUpdater" and "PrinchCloudConnector" Windows services.
- Uninstall the Princh Software Updater service & Princh Cloud Connector service.
- Delete the registry key that holds configuration data from the previously installed Princh Cloud Connector service. Skipping this step will prevent you from installing Princh Cloud Connector on this server again at a later time.
- Delete remaining Princh Cloud Connector files.
Uninstallation steps:
- Navigate to the Windows search bar and open "Services".
- Find "PrinchSoftwareUpdater", right click, then select "Stop".
- Do the same with "PrinchCloudConnector".
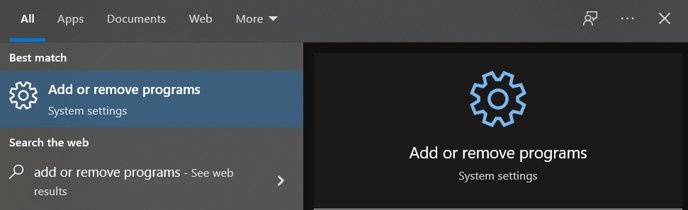
- Navigate once more to the Windows search bar and open "Add or remove programs".
- Find "PrinchSoftwareUpdater" and click "Uninstall". Complete the uninstallation process.
- Then, find "PrinchCloudConnector" and hit "Uninstall". Complete the uninstallation process.
- The Princh Cloud Connector registry key can now safely be deleted.
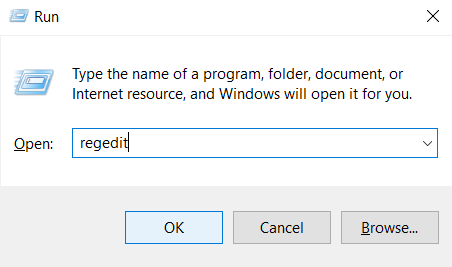
- Press the Windows Key + R and type "regedit" in the field and hit OK.
- Navigate to the follow directory and delete the "PrinchConnector" folder:
Computer\HKEY_USERS\S-1-5-19\SOFTWARE\Princh\PrinchConnector.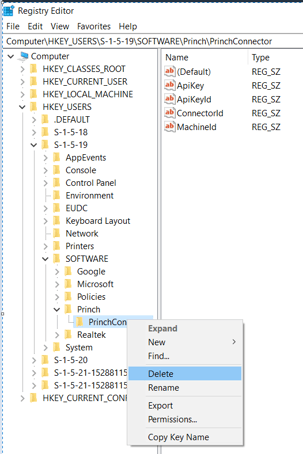
- Press the Windows Key + R and type "regedit" in the field and hit OK.
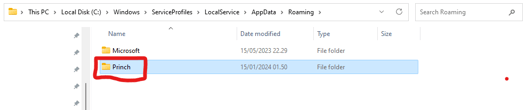
3. Navigate to the following directory in File Explorer and delete the folder "Princh":
C:\Windows\ServiceProfiles\LocalService\AppData\Roaming
The Princh Cloud Connector is now uninstalled.
If further assistance is needed, please contact Princh Support.